Friday, 30 March 2012

Chicken Kofta & Egg Curry

Today’s recipe is really appreciated by most South Asian families, however it still rather unknown in the West. Kofta curry, though delicious and relatively easy to prepare, is quite difficult to find in local take-away shops and on restaurant menus. Probably that’s why this appetizing dish is not as popular as well-known chicken or lamb. Also at the mention of curried egg most Westerners seem to frown for no reason. But whatever your fears are, I would highly recommend trying this dish at least once. I can guarantee most of you will fall in love with these lightly spiced meatballs in rich, mouth-watering sauce.
Ingredients:

FOR MEATBALLS (Koftas):
500g minced chicken
Breadcrumbs
2 Tbsp tomato puree
½ tsp garam masala
½ tsp cumin
½ tsp madras curry powder
½ tsp black pepper
Bunch of fresh coriander- finely chopped
Salt to taste

Base curry sauce:
2 medium sized onions- peeled and sliced
3 medium sized carrots- cut into chunks
½ tsp tumeric
1 tsp chilli powder
Salt + pepper- to taste


5-6 eggs- hard boiled
1 medium sized onion
3 cloves of garlic- finely chopped
1” piece of fresh root ginger- peeled and finely chopped
2- 3 fresh beef tomatoes –peeled and chopped or 200 ml canned tomatoes
2 Tbsp tomato puree
½ tsp garam masala
½ tsp curry powder
½ tsp cumin
½ tsp chilli powder
½ tsp turmeric powder
¼ tsp cardamom powder
Fresh coriander – to garnish
Oil + butter for frying


  • Put all the ingredients for the Koftas in a large bowl and mix well together using your hands. Cover with cling film and put to marinade in the fridge for about 30 minutes.
  • Meanwhile prepare base sauce for the curry. Slice your onions and cut carrots into chunks, add spices and enough water to cover the ingredients. Simmer on medium heat until the carrots soften. Take the pan off the heat and put aside to cool down. Then using hand blender blend the mixture to a soup-like base sauce. Put aside.  
  • Take out the kofta mixture from the fridge and stir it together once more.Always remember to dip you hands in water before making kofta balls, otherwise it will stick to the hands and will become shapeless. Start making small Kofta balls by taking the mixture little by little (smaller than a golf ball).
  • Meanwhile heat up the oil and butter on the heavy-based pan and fry onions until light golden. Once the Onions get dehydrated and start to change colour. Add garlic and ginger and fry for another 2 minutes, until aromatic.
  • Add all dry spices and stir together, until onions absorb colour and flavour.  
  • Now it’s time for kofta balls to go in.  Gently drop the meatballs into the pan and fry on a low heat until lightly browned.
  • Add tomato puree and tomatoes. Stir gently, so as not to break the meatballs. Fry for a few minutes, until tomatoes soften and sauce starts to thicken
  • Pour prepared earlier base sauce over the meatballs and add boiled eggs.
  • Increase the  flame to medium and simmer for about 40 minutes  until the koftas are fully cooked. If you want to make sure Koftas are cooked or not then , prick on the Koftas and if  a watery juice comes out, its cooked. The gravy can be as thick as you like so add or dry up the water as required. However, at this point, your curry should have smooth and creamy consistency.  
  • Few minutes before taking the dish off the heat garnish with fresh coriander. Serve warm with rice or Indian flat breads and Kachumbar salad. Enjoy!!! J

Tips:
·         Use any ground meat of your choice – turkey, beef or lamb. Some people also make vegetarian koftas.
·          Make smaller Koftas for faster cooking.
·         Instead of browning the koftas with onions, you can create the gravy first and drop the balls into boiling curry together with eggs. But please note the simmering time then may be slightly longer.
·         Increase the amount of Garam Masala and Red Chili Powder to make it a spicier dish. Also can use a chopped fresh chilli- add it to your curry at the same time as garlic and ginger.

    Wednesday, 28 March 2012

    Classic Moroccan Lamb & Veggie Tagine

    Moroccan tagine is a traditional slow-cooked stew, made from meat (generally lamb or chicken) and vegetables. The dish is usually cooked and served in a clay tagine pot consisting of a glazed clay base and a large conical lid that’s designed to guide the condensation from cooking back into the pot.   While simmering, the cover can be lifted off without the aid of a mitten, enabling the cook to inspect the main ingredients, add vegetables, mix the contents, or add additional braising liquid.
    For classic lamb tagine it’s best to use the shoulder, neck or shank of the lamb, cooked until it is falling off the bone. One of the ideas of the dish – as with most stews – is to use the cheaper cuts of meat and render them tender through slow cooking. You won’t find two cooks who’ll agree on what exactly should go into a tagine as most follow their own family’s recipe, finely tuned in their ancestor’s kitchens over decades.
    It takes plenty of time to prepare the stew and usually it takes longer than you might expect for the meat to achieve that fall-apart tenderness. So, leave it for at least three or four hours- from browning the lamb to possible serving time. Good news is that it doesn’t require much interference while shimmering, leaving you nothing to do but make some couscous a few minutes before serving.
    The best thing about tagine dishes is that, it’s really easy to prepare and it will fill your home with delicious aromas! If you manage to get it tender enough, you can rely on this recipe to impress friends. Serve it with some crusty bread, rice or plain couscous.
    Ingredients:
    500g diced lamb
    1 medium sized onion- peeled and sliced
    2 garlic cloves- crushed
    1 aubergine or courgette- cut into chunks
    200g canned tomatoes
    2 carrots- peeled and cut into chunks
    1 sweet potato- peeled and cut into chunks
    75g dried apricots
    75g dried prunes
    1 can chickpeas
    1 inch of stem ginger
    1 tsp paprika
    1 tsp cumin
    ½ tsp turmeric
    1 tsp garam masala
    ½ tsp saffron
    300 ml vegetable stock
    Bunch of fresh mint- finely chopped
    Salt & pepper to taste
    3 Tbsp of oil- for frying


    1. Heat the oil in a large flameproof casserole and brown the lamb in batches
    2. Add the onions and garlic and fry until soft and aromatic (about 5-10 minutes). Then add the paprika, cumin, turmeric, garam masala, saffron and black pepper and fry another minute.
    3. Add the tomatoes, carrots, apricots prunes and stock to the casserole and bring to the boil. Then reduce the heat to low, cover and simmer for 1 hour. Season with salt.
    4. After an hour, add stem ginger, sweet potato and chickpeas and apricots and continue to simmer gently for another 2 hours until the meat is tender. Add a little water if the liquid has reduced - you want plenty of rich sauce.
    5. 15 minutes before taking the casserole off the heat add courgette (or aubergine) chunks and chopped mint leaves and carry on cooking.
    6. Serve the stew spooned over the couscous or rice and garnish with mint leaves. If you are a lucky owner of traditional Moroccan tagine dish, you can use it to serve your stew. Enjoy!
    Authentic Moroccan tagine pots.
    Tips:
    You can easily turn your tagine stew to a lovely vegetarian dish. Instead of lamb use more vegetables and start the recipe from step 2. Of course veggie stew won’t need that much time for the ingredients to soften and melt in your mouth. So keep on checking and when your tuber vegetables soften add courgettes and mint and cook for about 15 minutes so they can absorb the flavour. Enjoy!

    Tandoori Lamb Chops

    Tandoori lamb chops are easy to prepare and delicious to eat. Even though they are not seen as often on Indian menu as Tandoori chicken it’s definitely worth to dedicate this post to them. Lamb chops are usually served as a starter, but they’ll also make a perfect light lunch. The name ‘tandoori’ simply means cooked in a ‘tandoor’- a very hot cylindrical clay oven, using charcoal, typical for South Asian cuisine. It does not dictate the exact spices used or the colour of the finished product. Spices are of one’s own choice. The dish cooks just as well in any type of hot oven. I’ve also have good news for barbecue lovers. As BBQ season has just started, you can grill your marinated lamb chops as a healthy halal alternative to traditional pork dishes and accompanying other delicacies.


    Ingredients:
    1kg lamb shanks or chops
    1 tsp paprika
    1 tsp cumin
    1 tsp garam masala
    ½ tsp turmeric
    ½ tsp saffron
    2 Tbsp oil
    1 medium sized onion – peeled and chopped into quarters
    Bunch of fresh mint leaves- to garnish
    Few dried apricots & prunes- to garnish
    Salt & pepper to taste


    Any lamb pieces will do for this dish but good quality, fresh lean lamb cutlets seem just ideal. This particular dish is best to be left to marinate for at least 4-6 hours or over night before cooking.
    1. Prick each lamb chops a few times with a fork (It helps to absorb flavours) and place them in a bowl.
    2. Add paprika, cumin, garam masala, turmeric, saffron, oil, salt and pepper. Mix well together with your hands to make sure the lamb chops are covered with spice mixture and oil.
    3. Cover the bowl with cling film and leave for a few hours or overnight in the fridge.
    4. Preheat oven to 200º C (tandoor is supposed to be very hot).
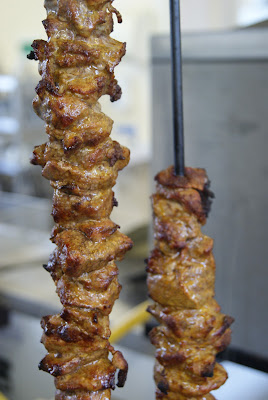
    5. Place the lamb chops on the skewers, adding onion chunks in between. Bake in the centre of the hot oven, until nicely browned and dry.
    If baking in normal oven you may want to place your lamb chops on baking tray. Remember to turn the pieces over half way through cooking. You may also need to drain off the excess liquid from the cooking tray so that the end result is not soggy. The lamb chops should look crispy and charred in places, as if you have cooked them on a BBQ. Cooking time varies in different ovens but it usually 30 minutes in a preheated oven.
    6. Serve hot, garnished with fresh mint leaves, dried apricots and prunes. For spicier alternative- garnish with onion rings and green chillies instead. Tandoori lamb chops go perfect with other curries, daals and Indian flat breads. They also taste well as a starter served on its own, with mint yoghurt or salad.
    Enjoy!
    Alternative for everyone who hasn’t got access to tandoor- Lamb chops baked in the oven.

    Tuesday, 27 March 2012

    Tagliatelle pasta with lightly spiced up hake fillet and tomato sauce


    As promised last night, in today’s recipe we are going to use our home-made pasta. Obviously making pasta takes a bit of time and effort but besides that the recipe is really simple and in a hurry you can prepare an elegant, well presented dish.


    Ingredients (to serve 4):
    500g fresh egg pasta
    4 medium sized hake fillet
    ½ tsp paprika
    1/3 tsp turmeric
    ½ tsp saffron
    ½ tsp pepper
    ½ tsp salt
    Oil for frying 


    TOMATO SAUCE:
    400 ml canned tomatoes
    2 Tbsp butter
    4 Tbsp cream cheese
    Salt to taste


    1. Wash the fish fillets and pat dry with a paper towel. Mix the dry spices together in the bowl and rub on the fish. Place prepared fillets on a tray, cover with cling film and marinate in the fridge for at least 1 hour. (We were already using this marinade to prepare filling for ravioli, remember?)
    2. When hake is marinated and ready to fry, heat the oil in a medium-sized non-stick saucepan. Fry the hake fillets on low-medium heat until fully cooked. Starting from the skin side.
    3. Meanwhile cook the pasta in salted boiling water according to instructions from previous post. If using different kinds of pasta follow the cooking instructions on the packet.  As a guide, per person you should allow 75g-115g/3oz-4oz dried pasta; 115g-150g/4oz-5oz fresh pasta; however it all depends on your appetite and personal preferences. Taste during the cooking process to make sure the pasta is neither too soft nor too hard. Once cooked, drain into a colander and shake well to remove all excess water. Set aside. 
    4. Prepare tomato sauce by mixing canned tomatoes with butter on a heavy-based pan and fry until tomatoes are soft. Add cream cheese and mix well together. Simmer on a low heat for a few minutes to achieve smooth and thick consistency of the sauce. Salt to taste. At this stage, without using other spices sauce will taste a bit bland; however while serving with marinated hake fillets it will absorb the flavours from the fish.
    5. Now place the pasta onto serving plates, top with warm tomato sauce and fry hake fillets to the centre. Garnish with fresh parsley or basil leaves. Enjoy!
    Tips:
    Other way of serving is to stir your pasta into the tomato sauce and top it with fish fillet. Whichever way you chose it looks really good and it’s equally tasty. 

    Home-made fresh egg pasta- Tagliatelle

    Pasta is a staple in traditional Italian cuisine. This food product made of unleavened dough was already known in early 12th century and it is a principle ingredient of many dishes. Nowadays pasta comes in varieties of shapes and colours, but traditional recipe is really simple and so are the ingredients. Here is a secret formula for delicious fresh egg pasta (known in Italian as pasta fresca or pasta fatta in casa or pasta all'uovo). It tastes so much better than one bought in the shop.


    Ingredients:
    200g ‘00’ type flour (Farina tipo –soft Italian flour)
    2 large organic eggs
    Salt

    (one egg for every 100 grams (3.5 oz) of flour)


    Farina Tipo "OO" is the best kind of flour for making most kinds of fresh pasta. It is made with soft wheat (farina di grano tenero) that has been very finely ground and all impurities removed. Farina gives the pasta a lovely texture, somewhat firm but not nearly as firm as store-bought pasta. If you can't find this type of flour, regular 'all purpose' flour can be used.  Some people also mix all purpose flour with cake or pastry flour, trying to achieve the texture of farina. Various stores offer “fresh pasta” made with semolina flour, which is the kind of flour used to make 'industrial' pasta like spaghetti, penne, etc. However it gives the pasta a hardness that is not characteristic of fresh pasta.
    Method:
    1.          Place the flour and salt on a clean work surface or in a bowl. Make a hollow well in the middle and crack the eggs into it.

    2.          Begin to mix around using the tips of your fingers, incorporating a little at a time, until everything is combined. At first it will look rather crumbly, but keep working in a circular motion, to bring the flour and egg together to form dough.

    3.      Now knead for ten minutes or until the dough is very smooth and elastic. Use the heel of your hand and your upper body weight to push the dough out along the work surface, then fold the dough back and press down on it with your knuckles. Give it a half turn and repeat, using a rhythmic motion. This process helps develop the gluten in the flour, otherwise your pasta will be flabby and soft when you cook it, instead of springy and al dente. 

    4.          When the dough is silky smooth, shape it into a ball. Wrap the dough in cling film and leave to rest in a fridge for at least 30 minutes to an hour.  Make sure the cling film covers it well or it will dry out and go crusty round the edges.

    5.    Remove your pasta from the fridge and flour a rolling pin and work surface. If using a machine to roll your pasta, make sure it's clamped firmly to a clean work surface before you start (use the longest available work surface you have) Now roll out the dough to about 1/2 cm thick.

    6.    Pass it through the machine set at its widest setting. Do this a couple of times, before reducing the width by one setting and passing through. Repeat the passing / reducing width process until the desired thickness of pasta is reached. 

    7.       If you haven't got a pasta machine it's not the end of the world. Most of Italian housewives rolls pasta with their trusty rolling pins and they wouldn't even consider having a pasta machine in the house! When it comes to rolling, the main problem you'll have is getting the pasta thin enough to work with. It's quite difficult to get a big lump of dough rolled out in one piece, and you need a very long rolling pin to do the job properly. The way around this is to roll lots of small pieces of pasta rather than a few big ones. You'll be rolling your pasta into a more circular shape than the long rectangular shapes you'll get from a machine, but use your head and you'll be all right! 

    8.      Whether you're rolling by hand or by machine you'll need to know when to stop. If you're making pasta like tagliatelle, lasagne or stracchi you'll need to roll the pasta down to between the thickness of a beer mat and a playing card; if you're making a stuffed pasta like ravioli or tortellini, you'll need to roll it down slightly thinner or to the point where you can clearly see your hand or lines of newsprint through it. 


    9.          Once done cut your pasta with a knife or cutting device on your machine into the desired shapes. Pasta dries really quickly so whatever recipe you follow don’t leave it for more than a minute or two before cutting or shaping it. You can lay over a damp clean tea towel which will stop it from drying.
    10.          Pasta is ready. You can now either hang it to dry or cook it right away in salted boiling water – it’ll only take a couple of minutes, unlike dried pasta, so keep an eye on it.
    In the next recipe we will be using our fresh egg tagliatelle to prepare delicious pasta and hake dish with tomato sauce.
    Enjoy!