Tuesday 19 June 2012

Bacon & Sausage Savoury Rolls

Sausage savoury pastry, commonly known as Sausage Roll is extremely popular in the bakeries and sandwich shops across the UK. It can also be served as a snack at the parties and can be served either hot or cold. Sausage rolls were already known in 18th century and nowadays are probably one of the most popular, take-away breakfasts in Britain. However not many people know how easy it is to prepare them at home. Are you a sausage rolls lover? Or maybe you were never allowed to try them before, because of your diet restrictions? Then this is the recipe you’ve been looking for. It’s quick, simple and can be adjusted to everyone’s needs. (Recipe by Chef Clary Wilson)

Ingredients:
340g puff pastry
4 leans slices of bacon
4 Sausages
1 red onion- sliced thinly
50g grated cheddar cheese
Oil- for frying
Egg- for brushing


Method:
  1. In a frying pan, fry the bacon and sausages in oil until light brown on low heat.
  2. Fry the onions until translucent.
  3. Roll out the puff pastry (approx. 3-5 mm thick) and cut into sauces size circle.
  4. Wrap a sausage in a slice of bacon and place in the middle of puff pastry circle. Sprinkle with onions and cheddar cheese.
  5. Pick up one side of the pastry and fold to the centre. Brush with egg and fold over the other side. Brush with egg all over to give your sausage rolls a nice glaze.
  6. Place on greased baking tray and bake for 20-25 minutes at 180C until golden brown. Enjoy!
TIPS:
You were never able to try a sausage roll, because of halal or vegetarian diet. It’s not a problem anymore! You can easily change this recipe to create a delicious snack, suitable for you. I was always stuck to cheese and onion pastries until I’ve learnt to make these sausage rolls at home.  For my halal sausage rolls I use sausage shaped kebabs, instead of bacon and sausages. They add more flavours to the snack due to various spices used and also you can experiment with different meat: chicken, lamb, goat, etc. You can also use different spices to marinade the meat. Here is a quick reminder of our best recipes: Sheekh kebabs, Chicken Koftas and Meatball curry. Simply shape a long, sausage-like kebab and prebake it in the oven at 180C, until golden brown. This will assure you the meat is cooked properly and also help to get rid off excess fat from the meat.
If you are vegetarian you can buy meat-free sausages in the supermarket and use them instead. They are usually made of soya and vegetables and they are very healthy and tasty alternative for traditional sausage.
To add more flavours to this tasty party snack I also upgrade the recipe by adding other type of cheese. My favourite is Red Leicester, but you can adjust it to your own preferences. Enjoy!


An Excellent aid for learning

An Excellent tool to aid your international cookery course, good use of pictures and recipes and an excellent way of sharing ideas and recipes make sure that you reference this culinary tool in your work

Gary

Sunday 17 June 2012

Kofta Meatball Curry- known dish, unknown experience...

This is the second attempt to make this delicious Indian dish. If you enjoyed the recipe I posted in March, you should also try this one. It could be good opportunity to observe how spices can change the taste of the dish. Here is another recipe for Kofta Curry: same main ingredients, same preparation method, but totally different experience for your taste buds.  (Recipe by Chef Clary Wilson)
Ingredients for Koftas (meatballs)
300g lean minced beef/ lamb/ goat/ chicken
1 tsp kebab masala
1 egg
½ tsp salt
½ tsp ginger powder
½ tsp garlic powder
1 tsp garam masala
1 tsp tandoori masala
½ tsp black pepper
¼ medium sized onion- chopped finely
1 Tbsp coriander- chopped finely


Mix all the ingredients in a large bowl and marinade for a while. When the mixture absorbs the flavours, make walnut size meatballs and pre-bake them in the oven (at 180C) until light brown. It will help to preserve the shape of the koftas and prevent them from falling apart when dropped into the curry sauce.


Ingredients for the sauce:
50 ml canned tomatoes
150 ml onion sauce (or 1 medium sized onion- chopped finely)
½ green chilli chopped finely
1 tsp tandoori masala
½ tsp ginger powder
½ tsp garlic powder
½ tsp garam masala
½ tsp salt
1 Tbsp coriander- finely chopped
2 Tbsp natural yoghurt
2 Tbsp vegetable oil
Ketchup- to taste

Put tomatoes, yoghurt, chilli, coriander and dry spices in a bowl and mix together to make a paste.
Heat up the oil in a large heavy-based pan. Fry the onion sauce and prepared paste, gradually adding a table spoon at a time and mixing together until the sauce turns lightly brown.  (If you are using chopped onion instead, fry it gently until soft and light brown before mixing the paste in).
Drop pre-baked meatballs into the sauce and shake the pan. Do not stir as it may break the koftas. Keep the lid on and simmer for 25-30 minutes on low heat. Few minutes before taking the dish off the heat add some ketchup to sweeten the sauce and garnish with fresh coriander. Serve with rice or Indian flat breads. Enjoy!


Thursday 14 June 2012

Chiken Tikka Masala- Britain's favourite curry

Chicken Tikka Masala- this beloved South-Asian dish with unclear origin is probably more popular around the world than in India. Proclaimed to be ‘Britain’s true national dish’, it is the most often ordered dish in restaurants and take-aways around the UK. So what is the secret behind this famous curry and where is it really coming from?
The word Tikka means pieces or bits. Masala stands for the spices contained in the curry. Chicken Tikka Masala is a delicious dish in which pre-marinated pieces of chicken are grilled and then cooked in thick, deliciously creamy gravy. The result is a lovely smokey flavour and characteristic orange-coloured sauce.    There is no standard recipe for chicken tikka masala; a survey found that of 48 different recipes, the only common ingredient was chicken; however classic onion, tomato and coriander base seems to be most popular. Also origin of this delicious dish is wrapped in mystery. Some people have drawn comparisons between chicken tikka masala and butter chicken, other creamy North Indian dish. Some people claim Tikka Masala is an accidental product of Punjabi cuisine which was subjected to numerous improvisations. Others argue it was rather invented in the UK, to suit the taste of British curry-lovers.
This recipe shows how to prepare it the classic way- marinating the chicken first and then cooking it in the curry sauce. (Recipe by Chef Clary Wilson)

Ingredients for Chicken Tikka Marinade:
250g chicken breast- diced 2.5 cm
2 Tbsp plain yoghurt
2 Tbsp double cream
2 Tbsp mustard or vegetable oil
25g onion- finely chopped
1 green chilli- finely chopped or ½ tsp chilli powder
½ tsp ginger puree or powder
½ tsp garlic puree or powder
½ tsp garam masala
½ tsp Kashmiri masala paste
½ tsp Tikka masala paste

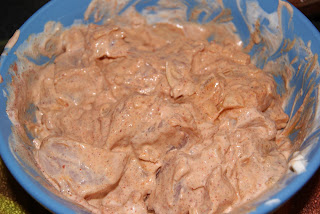
Put all above ingredients in a bowl and mix well together. Cover with cling film and leave to marinate in the fridge for at least 1 hour.
When the chicken is ready, place it on a lightly greased baking tray and bake at 180C (in preheated oven) for approx. 15 minutes. Turn it over once.
Alternatively place it on metal skewers and cook in Tandoor oven for 10-12 minutes.


Masala Sauce:
2 Tbsp mustard or vegetable oil
½ tsp ginger puree or powder
½ tsp garlic puree or powder
½ tsp tandoori masala
½ bell pepper (green)- diced finely
½ bell pepper (red) – diced finely
1 tsp paprika
1 tsp salt
2 tsp kasoori methi (dried fenugreek leaves)
½ tsp garam masala
2 tsp tomato puree


Place all the ingredients in a small bowl and blend together until smooth to make a paste.
 Heat the oil in a frying pan and add the masala sauce gradually a tablespoon at a time until the sauce turns light brown.
 Add cooked chicken, mix together and simmer on a low heat for about 20 minutes. If required add some Yakni stock (two tablespoons at a time).
Take off the heat and cool slightly. Mix in some plain yoghurt and single cream (ratio 1:1) to taste. Garnish with chopped fresh coriander. Serve with Indian flat breads or rice. Enjoy!


Wednesday 13 June 2012

Mint raita yoghurt dip

Finally here comes the time to post famous Mint raita recipe. This rich and fresh yoghurt sauce is a staple in Indian homes as it can be served with almost every dish.  It is essential especially during the hot weather or as an accompaniment for hot and spicy curries as both mint and yoghurt are known for their cooling properties. It balances the richness of Indian dishes and tastes particularly good with stuffed Parathas (flatbread) and Biryanis and Pulaos (rice dishes), but also as a dip for popular starters, like samosas or onion bhajis.
Same as many other Indian recipes, there is no defined formula as such. Raitas are very flexible and depending on your needs adjust the ingredients below to create the taste that suits your personal preferences and various dishes.
(Recipe by Chef Clary Wilson, comments and tips by meJ )

Ingredients:
150g natural yoghurt
1 small piece of cucumber- chopped finely
1 sprig of fresh coriander- chopped finely
½ tsp dried or fresh mint- chopped finely
½ medium sized tomato- chopped finely
2 slices of onion- chopped finely
1 radish grated
½ tsp cumin seeds- dry roasted and grinded into powder
½ fresh chilli- chopped finely
¼ tsp black pepper
¼ tsp mango (amchoor) powder
¼ tsp salt
½ tsp sugar

Mix all the ingredients together in a small bowl. Enjoy!

TIPS:
 Take the fresh yogurt and pass that through a sieve so there are no lumps in it. This should create a perfect consistency of your raita.
As I mentioned earlier you can experiment with ingredients ratio. You can also omit some ingredients. If you decide to use more vegetables your raita will gain a salad consistency. You can decide to reduce the components to make it more sauce like.
I find that cumin might be slightly overpowering, so don’t rush with adding too much of it, unless you really like its strong flavour.
Usually I also replace fresh chilli with hot chilli powder, which adds spiciness and works perfectly if raita is served as a dip for milder snacks in example: pakoras. But if you want to achieve opposite effect and tame the heat of curries with cool raita, you should rather be careful.
If you like strong minty flavour make sure you are using fresh mint leaves. Before mixing them with yoghurt, using mortar and pestle, grind them to a fine paste with a few drops of water.

Onion masala- curry base sauce

This is the foundation for most of tasty curries served in British Indian restaurants. . Indian gravies need to cook for some time in order to develop their flavour, so preparing a proper Indian dish can be really time-consuming. For that reason all restaurants and take-away businesses usually rely on this secret recipe.  Instead of preparing everything from the beginning they will use a ladle or two of “base sauce” and add extra ingredients to customise the dish. It allows the restaurant to produce curries in no time at all. This can be used with any meat, poultry or vegetables you want. The substance, flavour and texture of the sauce only rely upon fresh and natural ingredients: onions, ginger and garlic. There are many recipes for the curry gravy, but unlike its plain variants this sauce is also very tasty on its own. Onion masala can be prepared in greater amount and easily frozen to be used when you need it. (Recipe by Chef Clary Wilson)
Ingredients:
500g onions- peeled and sliced
100g canned tomatoes
½ bell pepper or chilli pepper- chopped
1 Tbsp fresh coriander- chopped
½ tsp turmeric
½ tsp garam masala
½ tsp tandoori masala
1 Tbsp Kasoori Methi (dried fenugreek leaves)
½ tsp ginger powder or 1” piece fresh root ginger- peeled and finely chopped
½ tsp garlic powder or 3 garlic cloves- finely chopped
600ml water
Salt to taste

Method:
Place all the ingredients in a heavy based pan and boil on medium heat for about 40 minutes, until onions soften and absorb flavours. Take off the heat and cool down to the room temperature. Place the mixture in a blender and blend until smooth. Your base sauce is ready. Now it can be portioned into airtight containers and stored in the freezer until needed. Otherwise you can place it back in the pan, adding more ingredients to prepare a delicious curry of your choice.
TIPS:
If you want your sauce to have more flavour and aroma use fresh ginger and garlic instead of the powder.
Capsicum present in bell peppers or chillies is responsible for spiciness of your sauce, so you can adjust it to your own preference. Bell peppers won’t be as hot as red or large green chillies, while finger chillies will add the extra kick to the basic recipe.
Obviously you can prepare more sauce by simply multiplying the ingredients, but there are some special considerations. Salt and any of the stronger spices (such as black pepper, chilli and garam masala) need to be added judiciously or else they may dominate the base sauce. It’s best to tread carefully with these items and adjust the flavours before serving the finished dish.


Wednesday 30 May 2012

We are on facebook...

There's a good news for all our fans and followers. Finally we are on facebook :-) http://www.facebook.com/pages/Passion-for-cooking-cooksinternationalblogspotcom/398353746875357
Like us, comment and check for new updates and recipes...

Thursday 24 May 2012

Samosa- the king of Indian snacks

While trying delicatessen from Indian cuisine you cannot forget about the king of South Asian snacks- Samosa. These fragrant golden pastries with savoury filling are a ‘must have’ on every party and celebration menu. They are also widely sold on street chaat stalls. Samosa can be a perfect bite when you are hungry and in a hurry or want to surprise your guests with both tasty and easy appetiser. Filling, preparation method, size and shape of samosas may vary slightly, but usually they are known for their characteristic triangular shape. They are usually accompanied by chutney, onion salad or raita yoghurt dip.
 The samosa has been one of India’s beloved food for centuries. It is believed to have originated in Central Asia prior to the 10th century. It was introduced to the subcontinent in the 13th or 14th century by traders from the region. Nowadays they are popular all over the world and many regional variations can be found. Most famous types are Arfican sambusa (eaten in Somalia, Ethiopia and Djibouti), Israeli sambusak- milder version of its Indian equivalent, or Chamuças famous in Portuguese-speaking countries and Goa. In recent years samosa also became very popular in English-speaking countries like United Kingdom, South Africa, Kenya, Canada, and the United States. However Westerners often prefer its baked version, instead of deep fired original.
But no matter what your preferences are, if you love Indian food you should try this original Samosa recipe. Despite of being quite time consuming, preparation is relatively easy and you patience will definitely be rewarded with delicious flavour of the dish. You can also experiment and add your own flavours to this time honoured basic samosa recipe. (Recipe by Chef Clary Wilson)


Samosa Dough
Ingredients:
300g plain flour
25g margarine or oil
1 tsp salt
1tsp onion seeds (optional)
75ml warm water


  • Mix the flour and margarine, using the rub in method, until flour looks like breadcrumbs.
  • Add salt and onion seeds. Mix together
  • Gradually add water (a little at a time). Bring together and knead for 5 min. Allow to stand for 30 minutes. Meanwhile prepare samosa filling.
  • Roll dough out to form a 6 to 8" circle no thicker than the thickness of a coin. The diameter of the dough cookie determines the size of Samosa. 8" will make a large Samosa. Cook one side on the preheated tava pan for 10 seconds. Place the cooked side to bottom and keep warm in kitchen foil or tea towel.
  •  With a sharp knife cut the dough circle u into half. We will use one half to make one Samosa.
  • Damp edges with flour paste or egg and fold. To fold  lift one corner of half circle  (where the arch meets the straight cut), towards center. Left the other edge of half cookie and lay over the previous. Press to seal. Now, you have formed a dough cone.
  • Hold the cone in your hand and stuff with prepared filling.
  • After the cone is stuffed, Press and seal seal the open edge.You may flute this edge by hand or using a fork.
  • Deep fry the samosa at 200C until light brown.


Meat Samosa Filling
Ingredients:
250g minced beef/ lamb/ finely diced chicken
½ medium size onion finely chopped
½ fresh green chilli finely chopped
1 Tbsp fresh coriander finely chopped
1 tsp garlic powder
1 tsp ginger powder
½ tsp tandoori masala
½ tsp garam masala
1 tsp kebab masala
½ tsp salt
50g frozen peas
2 Tbsp vegetable oil


Method:
  • In a frying pan heat the oil and fry the onions  until golden and aromatic.
  • Add minced meat and stir fry until light brown
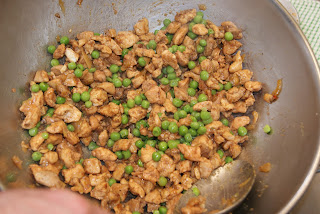
  • Add the chilli and dry spices and mix well together. Add peas and stir fry until peas are tender.
  • Cool before filling the samosas.

Vegetable Samosa Filling
Ingredients:
200g potatoes washed and diced small
50g frozen peas
50g sweetcorn (tinned or fresh)
50g carrots- peeled and diced small
½ medium size onion chopped small
1 dried red chilli de-seeded
½ tsp cumin seeds
½ tsp turmeric
½ tsp garam masala
½ tsp chaat masala
½ tsp ginger powder
½ tsp garlic powder
½ tsp  salt
Method:
  • In a saucepan boil the diced potatoes and carrots until they soften slightly. Then add peas and cook for another 3-5 minutes. Drain and mix in the sweetcorn.
  • In a frying pan heat the oil and fry the onions, cumin seeds and chopped red chilli until the onions are golden brown.
  • With 2 Tbsp of water make the paste of salt, turmeric, garam masala, chaat masala, ginger and garlic and add to the onions, cumin and chilli mix. Fry for 2-3 minutes until the flavour absorbed. Mix in the vegetables.
  • Cool before filling the samosas.
TIPS:
You can change the flavour of samosa dough by using different spices than onion seeds. Most popular equivalents are cumin seeds or ajwain (bishop seeds), but opportunities are almost countless and you can make it to your preference.
While putting your dough away to rest, rub some oil on the dough ball to prevent from creating hard shell and wrap it in a cling film.
You may choose to bake your samosas instead of frying them, as many people find it more convenient and healthier. To bake them put the samosas on lightly greased baking tray and lightly brush beaten egg over each samosa to give it a nice glaze. 

Wednesday 23 May 2012

Egg custart tart

Egg custard tart is regarded as another classic of British cuisine. Often described as favourite pastry in the British Isles, custard tarts are widely sold in supermarkets and bakeries throughout the UK. The history of egg tart reaches back to the Middle Ages. It’s usually associated with Medieval recipes for croustade, doucettes and darioles- old French custard pies consisting of shortcrust pastry shell filled with mixture of cream, milk and eggs, enriched with honey and spices. Modern egg custard tarts base on very similar formula. Apart from Britain custard tarts are widely enjoyed in Commonwealth countries like Australia and New Zealand. Also other countries have their regional equivalents. Most popular are French Flans pâtissier, Portuguese Pastel de nata or Dan Tat- speciality of Hong Kong cuisine. 
Ingredients:
200g short crust pastry
4 large eggs
1 pint whole milk
2 oz sugar
Large pinch or ground nutmeg
  • Preheat the oven to 190C. Roll out the pastry and line the flat tin. Press the pastry into the tin (Trim the edges of the tart with a sharp serrated knife.) Fill the pastry with baking beans. Blind bake for approx. 15- 20 minutes, until golden and sandy all over. 
  • Whisk the eggs lightly with the sugar.
  • Warm up the milk and pour it in continuous stream onto the eggs, whisking lightly. Strain into the pastry case and sprinkle the top with nutmeg.
  • Bake in the centre of the oven at mark 7 for 10 minutes and then reduce the heat to mark 4 and bake for a further 20-25 minutes until the custard is set.
  • When it's ready, the tart should be set and pale golden on the top, and have just the merest tremor in the centre when you jiggle the tray. Cool completely, then serve in slices. Enjoy!

Thursday 10 May 2012

Creamy chocolate mousse

Chocolate mousse is decadently delicious, elegant and impressive - yet stunningly easy to make. Chocolate mousse is also the perfect make-ahead dessert for dinner parties. You can make it a few days before then just pimp it up with the accompaniments at the last minute.

No matter how many new desserts come along, the traditional chocolate mousse always impresses with its rich and creamy taste. And, if you are not convinced yet, there is one really good reason to make it- CHOCOLATE! Chocolate intake has been linked with release of serotonin in the brain, which is thought to produce feelings of pleasure. So if you want to please your guests, try to do it with this simple recipe.

Ingredients:
100g dark chocolate (70% cocoa solids)
300ml double cream
2 tsp Amaretto or other liquor (optional)
1 large egg white
50g castor sugar
Handful of amaretti biscuits- to garnish
White or/and dark chocolate shavings- to garnish


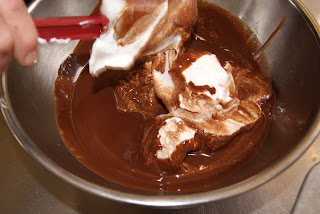
  • Warm 150ml of cream in a small pan on a low heat. When boiled take off the heat and add chocolate.
  • Mix well together until chocolate melts. Leave aside to cool slightly.
  • Add rest of cream and liqueur (if using). Whisk until thick. Liquor can be easily substituted with an amaretto syrup. It incorporates delicious, distinctive almond flavour and is 100% alcohol free.
  • Whisk egg white until peaks. Add a table spoon of sugar at a time- keep whisking until all added
  • Fold meringue into chocolate mixture and place in serving dishes.
  • Put in the fridge until service. Garnish with crushed biscuits and chocolate shavings. Enjoy!


    Wednesday 9 May 2012

    Traditional apple pie

    Apple pie is another old-fashion, perfect tasting dessert or tea time treat, which we would like to share here.
    Traditional apple pie showed up, in one form or another, since medieval ages. There is an English recipe that dates back to 1381. Although, without of a shadow of a doubt, apples cooked in pies pre-dates this by many 100's of years. Now almost every European country has its own variation of this British Classic and it’s also one of the most favourites in North America.
    Without any doubt cinnamon-scented apple pie with golden melt-in-the-mouth pastry conquers hearts all over the world.
    Here you will find out how to prepare this ultimate comfort food in easy way.

    Ingredients:
    1.5 kg cooking apples (such as Bramley or Granny Smith)
    100g sugar
    25g butter
    ½ tsp cinnamon


    • Peel, quarter and core apples. Cut them into small cubes

    • Melt the butter in a pan. Add sugar, cinnamon, apples and a few tablespoons of water. Cook over moderate heat for 10 minutes. Keep stirring to prevent the mixture from sticking to the pan.
    • When the apples are soft and slightly mushy take the pan off the heat and leave to cool down
    • Preheat the oven to 180C. Take half of the short crust pastry, roll out and line the tart tin. Trim the edges with a knife using the edge of the plate as your guide. Lightly prick the surface of the pastry with a fork.
    • Fill with apple mixture. Add some diced, uncooked apples to give your pie more distinctive flavour and better look. When apples are peeled and especially when sliced, their attractive white colour will very quickly turn a 'not-so-attractive' brownish colour, so by adding some freshly cubed ones you will increase the presentation value of your pie. 
    • Roll out the other half of the pastry and cover the apple filling.  Transfer the rolled out pastry to the top of the pie using the rolling pin. (First, lightly roll 50% or so of the flattened pastry over the rolling pin. Then support the rest with your hand and transfer it to top of the dish). Using both hands, 'crimp' the pastry round the edge of the pie to obtain an attractive finish. Finally lightly prick the pastry with a fork to allow the steam to come out during cooking and prevent the top going soggy.
    • Brush with egg wash to give it a light brown colour when cooked. Sprinkle with sugar and bake in preheated oven for approx. 25 minutes. Enjoy!
    TIPS:
    -     Apple pie tastes delicious warm or cold. You can serve on its own or with custard, whipped cream or ice cream.
    -       For more acidic and tangy flavour add a few drops of lemon juice to your apple mixture. It will also prevent apples from browning so quickly.
    -       If you want to add shine and sparkle to your apple pie, thin 4 tablespoons of golden syrup with very hot water. When the pie is done, brush the thinned syrup over the top of the pastry. You can add granulated sugar or demerara sugar at this time. Return the pie to the oven for 2 to 3 minutes to let the glaze dry and set.
    -      To check the doneness of the pie filling, insert a knife into the centre of the pie. If it meets with little or no resistance, the pie is done.
    If the pie is not quite done but the top or edges are becoming too dark, loosely cover the top of the pie with aluminium foil to shield it from the heat.
    -      When it is cooked, leave to cool for at least 15 minutes before slicing and serving to allow pie filling to set. Beware; apple pie can stay really hot for an hour or so. Ready apple pie can be stored in the fridge for a couple of days.